The Philippines is a hiker’s paradise waiting to be explored. With over 7,000 islands featuring diverse terrain—from rolling hills and lush forests to volcanic peaks, massive mountains, valleys, and coastal trails—there’s an adventure for every skill level. If you’re planning your first hiking trip in the Philippines, here’s your complete guide to getting started.
Filipino hikers use a unique classification system that’s essential to understand:
If you’re based in or near Manila, you’re fortunate to have several beginner-friendly mountains within a few hours’ drive. These peaks offer the perfect introduction to Philippine mountain hiking, with well-established trails, stunning views, and manageable difficulty levels. Here are the top recommendations for your first hiking adventure.
Known for its picturesque rolling hills and well-maintained trails. The open terrain offers stunning 360-degree views of Batangas and nearby provinces. The grassland terrain makes it ideal for first-timers, with multiple rest stops along the way. Travel time: 2-3 hours from Manila.
Features the famous Rockies formation viewpoint that offers spectacular views of Taal Lake and Volcano. The trail is straightforward for the first portion, though the final ascent to the Rockies requires some scrambling. Can be done as a day hike in 4-6 hours round-trip.
Often combined with Mt. Apayang for a traverse hike. Gentle slopes, wide trails, and a manageable distance make it perfect for absolute beginners. The summit offers views of Mt. Batulao and the Tagaytay ridge.
Dubbed the “sea of clouds” mountain, this offers cooler temperatures and relatively easy trails with spectacular scenery. The pine tree-lined paths and grassy slopes create an almost mystical atmosphere, especially during early morning hikes.
Features diverse terrain, including bamboo forests, open grasslands, and the iconic Parrot’s Beak summit monolith. The main trail is beginner-friendly, though climbing the Parrot’s Beak is optional and requires basic rock-climbing skills.
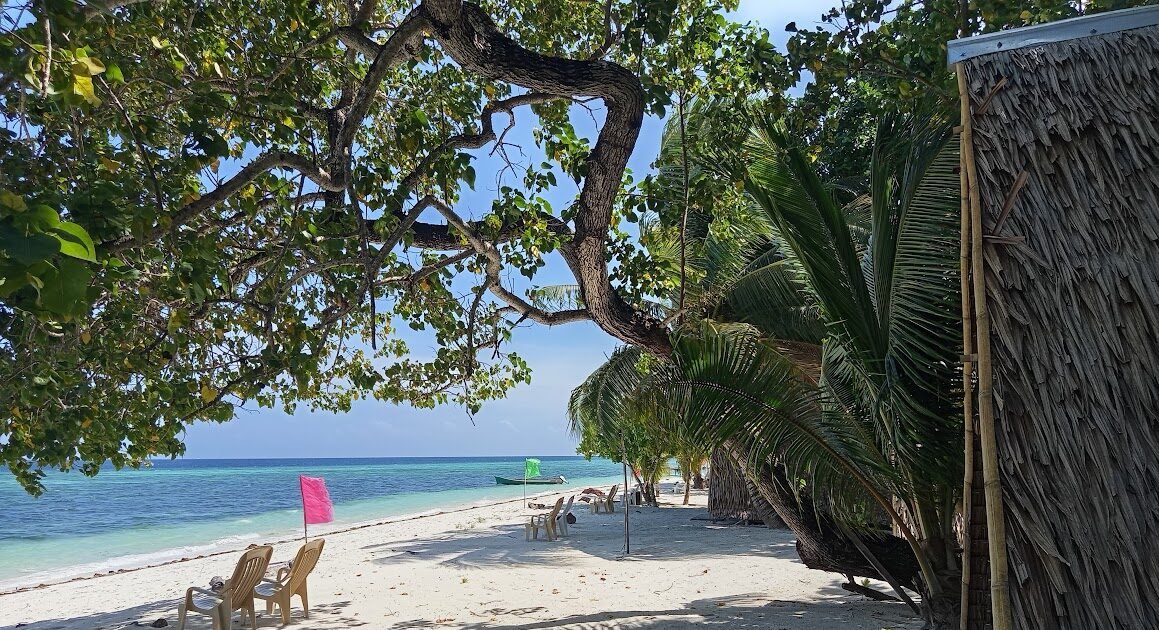
Perfect for beach and mountain lovers, this hike rewards you with views of Balayan Bay and Verde Island Passage. The relatively short trail and nearby beach make it ideal for a weekend getaway combining hiking and relaxation.
One of the closest mountains to Manila with a scenic trail through mossy forests. The summit offers panoramic views of Laguna de Bay and the Sierra Madre mountain range. It’s an excellent choice for testing your fitness before tackling higher peaks.
Features a river trek component and the option to visit Tinipak River’s limestone formations afterward. The trail passes through lush forests and offers views of the Sierra Madre range, making it a great introduction to combined adventure activities.
For first-time hikers looking for a more immersive experience, Sagada in Mountain Province offers the perfect blend of adventure, culture, and natural beauty. This mountain town sits at around 1,500 meters above sea level and provides a cooler climate year-round.
An easy 30-minute hike takes you through pine forests to view the traditional burial sites of the Igorot people. The trail is well-maintained and offers stunning valley views while providing cultural insight into indigenous practices such as the hanging coffins of the Igorot tribes.
A gentle rolling terrain reminiscent of Batanes (a scenic island province in the Philippines), perfect for sunrise or sunset hikes. The vast grasslands and panoramic mountain views make this an Instagram-worthy destination that requires minimal hiking experience.
A unique geological site in Sagada featuring striking blue-gray soil formations caused by high copper sulfate content. This 20-30 minute hike from the jump-off point offers otherworldly terrain perfect for photos and can be combined with a Marlboro Hills visit.
Located in Barangay Fidelisan in northern Sagada, a 2-3 hour trek (one way) through rice terraces, small villages, and forested paths. While it involves descending and ascending stone steps, the trail is straightforward, and the 60-meter waterfall reward is spectacular. Local guides are readily available.
Sagada’s highest peak offers a moderately challenging hike through pine forests with rewarding 360-degree views. The trail takes 2-3 hours to summit and is perfect for those wanting to step up from beginner trails. This is a popular sunset spot, so consider timing your hike to catch the golden hour from the summit.
Sagada’s unique ecosystem makes it ideal for mushroom exploration, especially during the rainy season (June-October). Join guided mushroom foraging tours led by local experts who can identify edible varieties like tengang daga (wood ear mushrooms), kabuteng kahoy (oyster mushrooms), and native shiitake varieties, just to name a few. These tours combine gentle hiking through mossy forests with hands-on education about fungi identification, traditional uses in Igorot cuisine, and sustainable foraging practices. It’s perfect for nature enthusiasts and food lovers alike. Tours typically last 4-6 hours and include preparation and tasting of foraged mushrooms.
Footwear: Invest in proper hiking shoes or trail runners with good ankle support and aggressive tread. Philippine trails can be muddy, rocky, slippery, or a combination of all three. For casual trails, running shoes with good grip may suffice, but real hiking boots are recommended for more technical terrain.
Clothing:
Sun Protection: The tropical sun is intense at higher elevations. Pack sunscreen (SPF 50+ and water-resistant), a wide-brimmed hat or cap, a buff/bandana for neck protection, and polarized sunglasses. For more detailed packing recommendations, refer to our ultimate Philippines packing list for every season.
Hydration and Food:
Navigation and Safety:
Other Essentials:

Best Season:
Begin your hike by 5-6 AM, or even 4 AM for popular mountains, to maximize your chances of a successful trek and a nice sunrise view. Starting early helps you avoid the midday heat and intense sun exposure while allowing you to enjoy clearer morning views before afternoon clouds obscure the summits. You’ll also ensure you’re off the mountain before dark, as sunset arrives around 5:30-6 PM. This early start provides crucial buffer time for unexpected delays, and most guides recommend reaching the summit by noon.
Check PAGASA (Philippine weather service) forecasts three to five days before your planned hike. During the rainy season, actively monitor typhoon tracking to avoid dangerous conditions. Join hiking Facebook groups for real-time trail condition updates from fellow hikers who have recently completed the route. Always be prepared to cancel or reschedule your hike—prioritizing safety over reaching the summit is essential. Remember that mountain weather changes rapidly, so maintain flexibility in your plans and be ready to adjust accordingly.
Responsible hiking goes beyond personal safety—it’s about respecting the environment, supporting local communities, and preserving these natural treasures for future generations. Following proper etiquette and regulations ensures a positive experience for everyone while minimizing your impact on the trails.
All mountains require registration at the jump-off point or barangay hall (the local village administrative office). Registration fees support trail maintenance, environmental conservation, tourism development, and local community support. Bring exact change in cash, as most places don’t accept cards.
Many mountains legally require guides, especially in protected areas. Even when hiring a guide is optional, doing so supports local livelihoods and enhances your safety in the Philippines. Guides know the trail conditions, weather patterns, and can provide crucial assistance in emergencies. Remember to tip your guides appropriately for excellent service.
Pack out everything you bring in, including food scraps, wrappers, and cigarette butts. Don’t leave biodegradable waste on the trail either, as orange peels take two years to decompose and banana peels require two to ten weeks. Use designated toilet areas or dig cat holes at least 200 feet from water sources. Never use soap in streams, and remember the golden rule: take only photos, leave only footprints.
Stay on marked trails to prevent erosion and protect the surrounding ecosystem. Don’t pick flowers or plants, disturb wildlife, or carve into trees and rocks. Avoid making excessive noise out of respect for other hikers and wildlife. Never feed wild animals, as this disrupts their natural behavior. Be especially mindful of sacred sites, particularly in the Cordillera region, where many mountains hold cultural and spiritual significance.
Uphill hikers have the right of way on narrow trails. Step aside and greet fellow hikers you encounter along the path. Keep your group together and avoid spreading too far apart for safety reasons. If you’re hiking faster than the group ahead, politely ask to pass. In rural areas, always close gates behind you to respect local farmers and property.
Always go with at least one companion, preferably someone experienced. Solo hiking is not recommended for beginners, especially on unfamiliar trails.
There’s no shame in turning back if you’re struggling. The mountain will always be there for another attempt. Listen to your body’s warning signs, such as dizziness, chest pain, or severe fatigue, and don’t push through pain. Remember this crucial rule: getting to the summit is optional, getting down safely is mandatory.
Leave a detailed itinerary with a friend or family member that includes which mountain you’re hiking, your expected return time, emergency contact numbers, and clear instructions on what to do if you don’t check in as planned.
Look down frequently for loose rocks, roots, and holes along the path. Test your footing before committing your full weight, and use trekking poles for added stability. Be extra careful on descents, as most hiking accidents happen while going down. Keep in mind that wet rocks, roots, or pine needles are extremely slippery and require additional caution.
For mountains above 2,000 MASL, take regular breaks during your ascent. Climb slowly to prevent altitude sickness, which manifests through symptoms like headache, nausea, dizziness, and shortness of breath. If these symptoms worsen, descend immediately. Stay well-hydrated and avoid alcohol the night before your hike.
When crossing rivers, unbuckle your backpack’s waist straps so you can escape if you fall. Use trekking poles or a sturdy stick for balance, and cross at the widest, shallowest point available. Face upstream and shuffle sideways rather than walking forward. Never attempt to cross swollen rivers regardless of your schedule or plans.
Know the emergency numbers before you go: 911 for national emergencies and 143 for the Red Cross. Save mountain rescue contacts on your phone before the hike, and learn basic first aid. Carry a first aid kit including an emergency blanket to prevent hypothermia, and familiarize yourself with the signs of heat exhaustion and heat stroke.
Physical preparation is one of the most important aspects of a successful and enjoyable hike. Proper fitness training not only makes the climb easier but also significantly reduces your risk of injury and helps prevent altitude sickness. Starting your preparation well in advance gives your body time to adapt and build the endurance needed for challenging trails.
Training Timeline: Start 4-8 weeks before your first hike
Cardiovascular Endurance (3-4x per week):
Leg Strengthening (2-3x per week):
Core Strengthening:
Practice Hikes:
Week Before:
After your hike, stretch all major muscle groups within the first hour and rehydrate immediately. Eat a protein-rich meal within two hours to aid muscle recovery. Rest for at least one to two days before resuming intense activity, and consider gentle walking or light stretching to prevent stiffness. If you experience persistent pain or swelling, consult a healthcare professional.

The Philippines’ diverse geography creates distinct weather patterns across different regions. In Luzon’s mountain ranges, hikers can generally expect drier conditions from December to May, making these months ideal for trekking. The Cordillera region maintains cool temperatures year-round, though fog is common and light rain can occur at any time, so preparation is essential. The Visayas islands enjoy their driest period from January to April, while Mindanao experiences more consistent rainfall throughout the year and is, fortunately, less affected by typhoons compared to other regions.
Typhoon season usually runs from June to November, a critical period that every hiker must respect. The Philippines experiences more than 20 typhoons annually, with the strongest systems typically arriving between September and November. Before heading out on any trail during these months, always check weather forecasts and local advisories, and be mentally and financially prepared to cancel your plans if conditions deteriorate.
Temperature varies dramatically with elevation, which significantly impacts what gear you’ll need to bring. At sea level, expect temperatures between 25-32°C, while trails between 500-1,000 meters above sea level (MASL) cool down to 22-28°C. As you climb higher to 1,000-2,000 MASL, temperatures drop further to 18-24°C. For the country’s highest peaks above 2,000 MASL, prepare for 8-18°C conditions, with summit temperatures at Mt. Pulag potentially plummeting to 0-5°C during the coldest periods.
Mountain hiking offers incredible photographic opportunities, from sweeping landscapes to intimate moments on the trail. With proper planning and technique, you can document your journey while staying safe and respectful.
Golden hour during early morning provides the best natural lighting for stunning landscape shots. Bring a microfiber cloth to keep your lenses clean, use a polarizing filter to reduce glare and enhance colors, and protect your camera gear from moisture using waterproof bags or covers. Pack extra batteries, as cold temperatures at higher elevations drain them significantly faster. Consider bringing a GoPro or action camera for hands-free shooting during challenging trail sections.
Never sacrifice your safety or that of your group for the perfect shot. Stay aware of your surroundings and avoid dangerous positions near cliff edges or unstable terrain. Always ask permission before photographing residents, guides, or sacred sites, especially in the Cordillera region, where many locations hold deep cultural and spiritual significance.
Your first hiking experience in the Philippines will be physically challenging but incredibly rewarding. The sense of accomplishment when you reach the summit, combined with the breathtaking views, unique cultural experiences, and camaraderie with fellow hikers, creates memories that last a lifetime.
Whether you choose the accessible peaks near Manila or venture to cultural gems like Sagada for a more immersive experience with mushroom foraging and indigenous traditions, the Philippines offers endless possibilities for adventure.
Start small, prepare thoroughly, respect nature and local communities, and listen to your body. Don’t rush to conquer the highest peaks—build your skills gradually. Every mountain teaches different lessons, and there’s no shame in starting with “easier” trails. Even experienced hikers return to beginner mountains for their beauty and accessibility.
Remember: hiking is not a competition. It’s about connecting with nature, challenging yourself, building friendships, and experiencing the incredible natural beauty of the Philippines. The mountain will always be there waiting for your next visit.
Pack your bags, lace up those boots, and start your Philippine hiking adventure. The trails are calling—will you answer?
Happy hiking, and see you on the summit!

Philippines Travel Guide seeks to share the vibe of an authentic experience through our idea of adventure travel for explorers and memory seekers in the Philippines.


Subscribe our newsletter for more update & news !!
Copyright © 2024. All rights reserved by Philippines Travel Guide.